
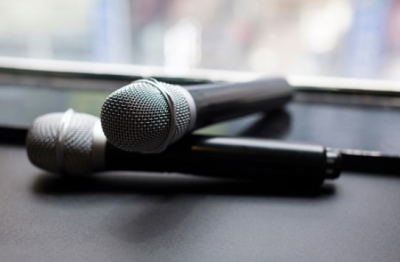
So, you have a receiver and a microphone (or you are planning on getting them) and want to connect the two.
A stereo receiver is perfect for all of your audiovisual needs, so it makes sense that you should be able to connect them easily, and the truth is that it could not be more straightforward (provided you have the right microphone inputs).
Read on to find out how to connect a microphone to a stereo receiver.
Step-By-Step Guide
Step 1: Check that you have the right connections.
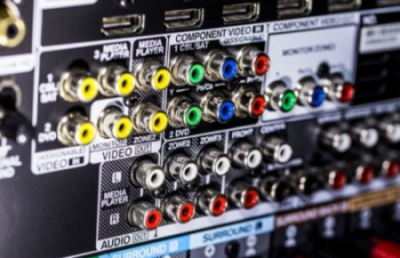
Most modern mics come with a 3.5mm input jack, and most modern receivers have a 3.5mm mic input on their audio interface. So far, so simple.
Many older microphones, as well as modern professional microphones designed for use with a mixer or other recording equipment, use an XLR plug instead. You’ll also find modern models designed for use with computers, gaming systems, and other electronic devices that use a USB microphone input.
You may find XLR or USB mic inputs on some devices, too, like home karaoke machines, music equipment like an amp or mixer, and even some stereo receivers. Most home theater equipment will expect you to connect a microphone through a 3.5mm jack. If yours lacks any of these options, you can find adapters to plug microphones in using RCA cables.
The easiest option here is to check what microphone input options your receiver or device has before buying your mic. If you’ve already purchased a microphone and it doesn’t fit your home karaoke machine or home theater system, you can use adapters to bridge the gap.
Step 2: Turn everything off.
Turning all of your equipment off will prevent annoying feedback while you’re connecting your new mic.
It also prevents power spikes that could damage your equipment and ensures the receiver or karaoke machine recognizes the new device, so there’s a practical reason to turn off your equipment before connecting a mic.
Step 3: Connect a microphone.
The input on your receiver should be clearly labeled, normally as “mic in” or “mic input.” Some receiver audio interface panels instead use images to differentiate similar jacks. Bear in mind that other equipment, like headphones and speakers, also use a 3.5mm jack, so don’t assume that you’ve found the correct one just because the plug fits.
Step 4: Turn Your Audio Equipment back on and test the microphone.
Speak into the microphone, and you should hear your voice come out of the speakers. If you don’t, there are a few quick things you should check before assuming the equipment is faulty or incompatible:
- Check the microphone jack to make sure it’s fully plugged into the receiver. Also verify that it’s connected to the correct plug for a wired microphone.
- Verify that the receiver, microphone, and speakers are all powered on. Some microphones have a power switch along the mic shaft, so check if that’s the case for yours.
- Check the volume level of all components in the home theater system, including the receiver, sound system, karaoke machine, and all other equipment that has a volume control. The sound level of the mic could be lower than you’re used to, so sometimes the fact that you can’t hear it doesn’t mean it’s not working. This connection guide might be also useful: How to Connect Amazon Fire TV Stick to AV Receiver
Step 5: Adjust the volume and sound settings.
Along with adjusting the volume knobs on your equipment, check whether there’s an internal mixer or EQ system. More advanced stereo receivers often have volume and level adjustment options specific to each input, or allow you to create custom sound setting profiles to differentiate your mic input settings from those for listening to music or watching movies.
How to Connect Wireless Microphones to a Stereo Receiver
Wireless microphones, like their wired cousins, don’t all connect to receivers, karaoke machines, and other equipment in the same way.
Some wireless microphones still require physical microphone inputs to function. These styles have a base that plugs into the receiver and a power source. This sends and receives signals to the wireless microphone when it’s in use, and serve as a charging station when it’s not.
Other styles use Bluetooth to connect to devices and don’t require any wires at all. Because of that, the steps to connect the microphone will be different depending on your model.
Whatever type of output your mic uses, we’ve got you covered! Here’s how to get that output to your receiver step by step. Learn how to connect Power Amp to AV Receiver
How to Connect a Wireless Microphone Base
1) Charge the wireless microphone (or insert the batteries). Even if it left the factory fully charged, its battery may have depleted in the time since.
2) Turn off the stereo receiver and speakers.
3) Follow the steps in the manual for connecting the wireless microphone base.
4) Turn everything on. There may be some extra steps to connect the microphone to the base, so double-check your manual to see if that’s the case.
5) Test the volume level by speaking into the microphone, and make whatever adjustments needed to the volume and EQ settings.
How-To: Connecting a Bluetooth Wireless Microphone
1) Plug in any necessary components, such as bases or adapters, that come with the microphone.
2) Pair the microphone to your receiver, karaoke machine, or other equipment. You may want to consult the manuals for all involved devices if you’re having trouble making the connection.
3) Test the microphone and adjust the volume and EQ settings as needed.
The step where you’re most likely to experience frustration is getting the microphone to pair. Sometimes this happens instantly. Other times, you may need to turn your equipment off and then on again, or unpair other Bluetooth devices, before it will recognize the device.
The best place to look for help if this happens is through the support website of your specific device. You can also check user forums dedicated to A/V and recording equipment for troubleshooting tips. Again, search posts for advice specific to your microphone brand and model for the best results.
Wrapping Up
As you can see from our short guide, it really is simple to connect a microphone to a stereo receiver.
Before you buy any new equipment, do a little research to ensure that you have the right microphone for your home theater setup. The most vital component is the connection. Once all your equipment is plugged in properly, you should have few problems in setting up your audio.